使用命令显示隐藏文件
sudo chflags nohidden opt
隐藏文件命令
sudo chflags hidden opt
使用命令显示隐藏文件
sudo chflags nohidden opt
隐藏文件命令
sudo chflags hidden opt
打开Charles,点击”help > ssl proxying” 中的 “install Charles root certificale”,进行安装本机证书,如图1:
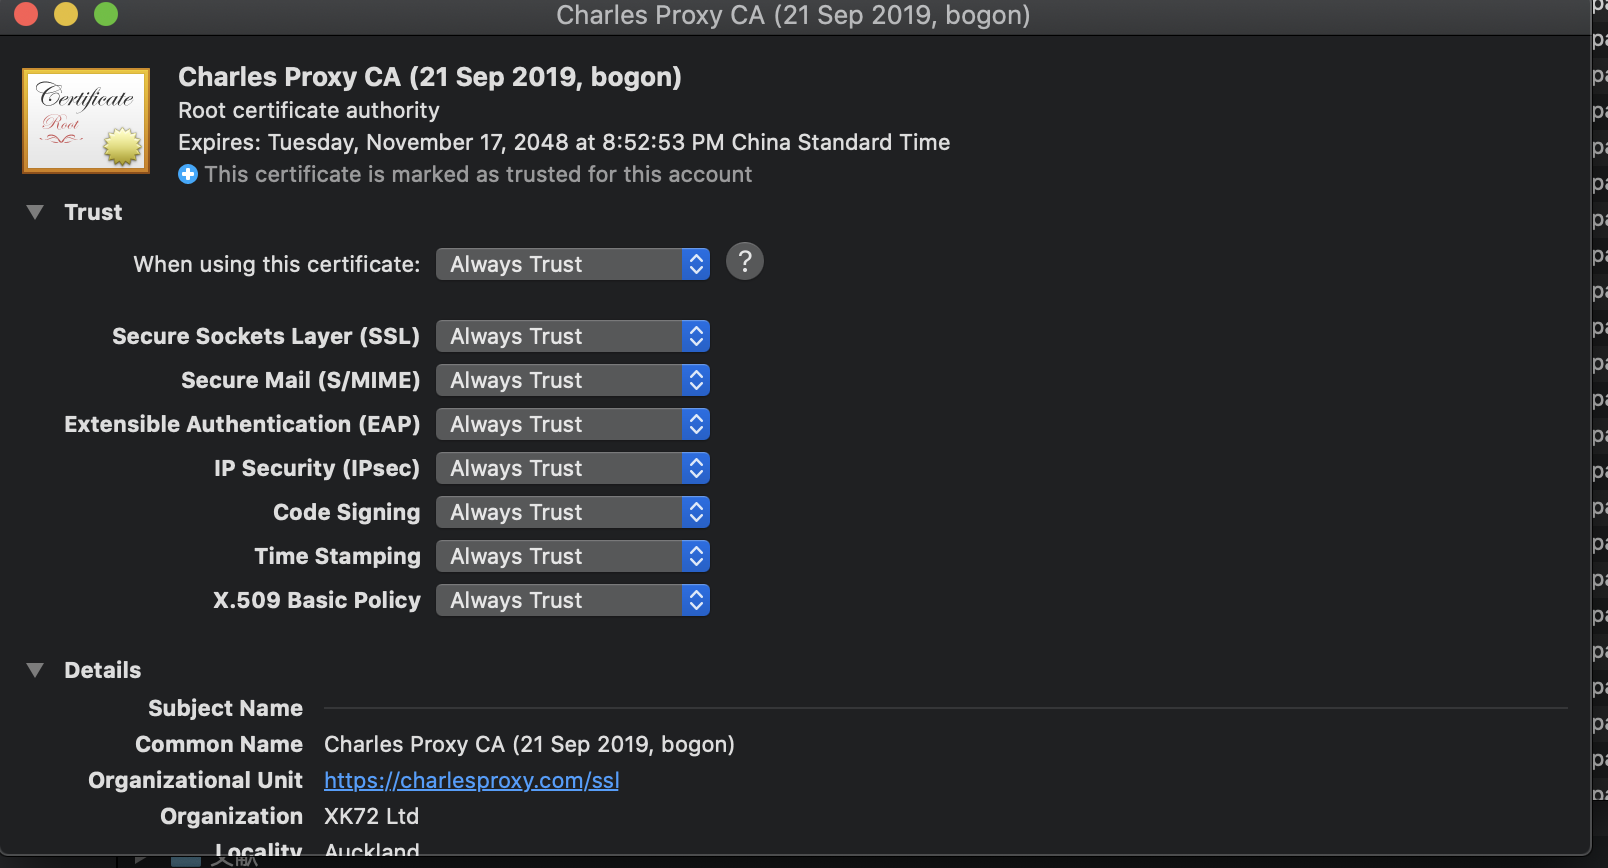
打开钥匙串将Charles证书设置为信任,如图2:
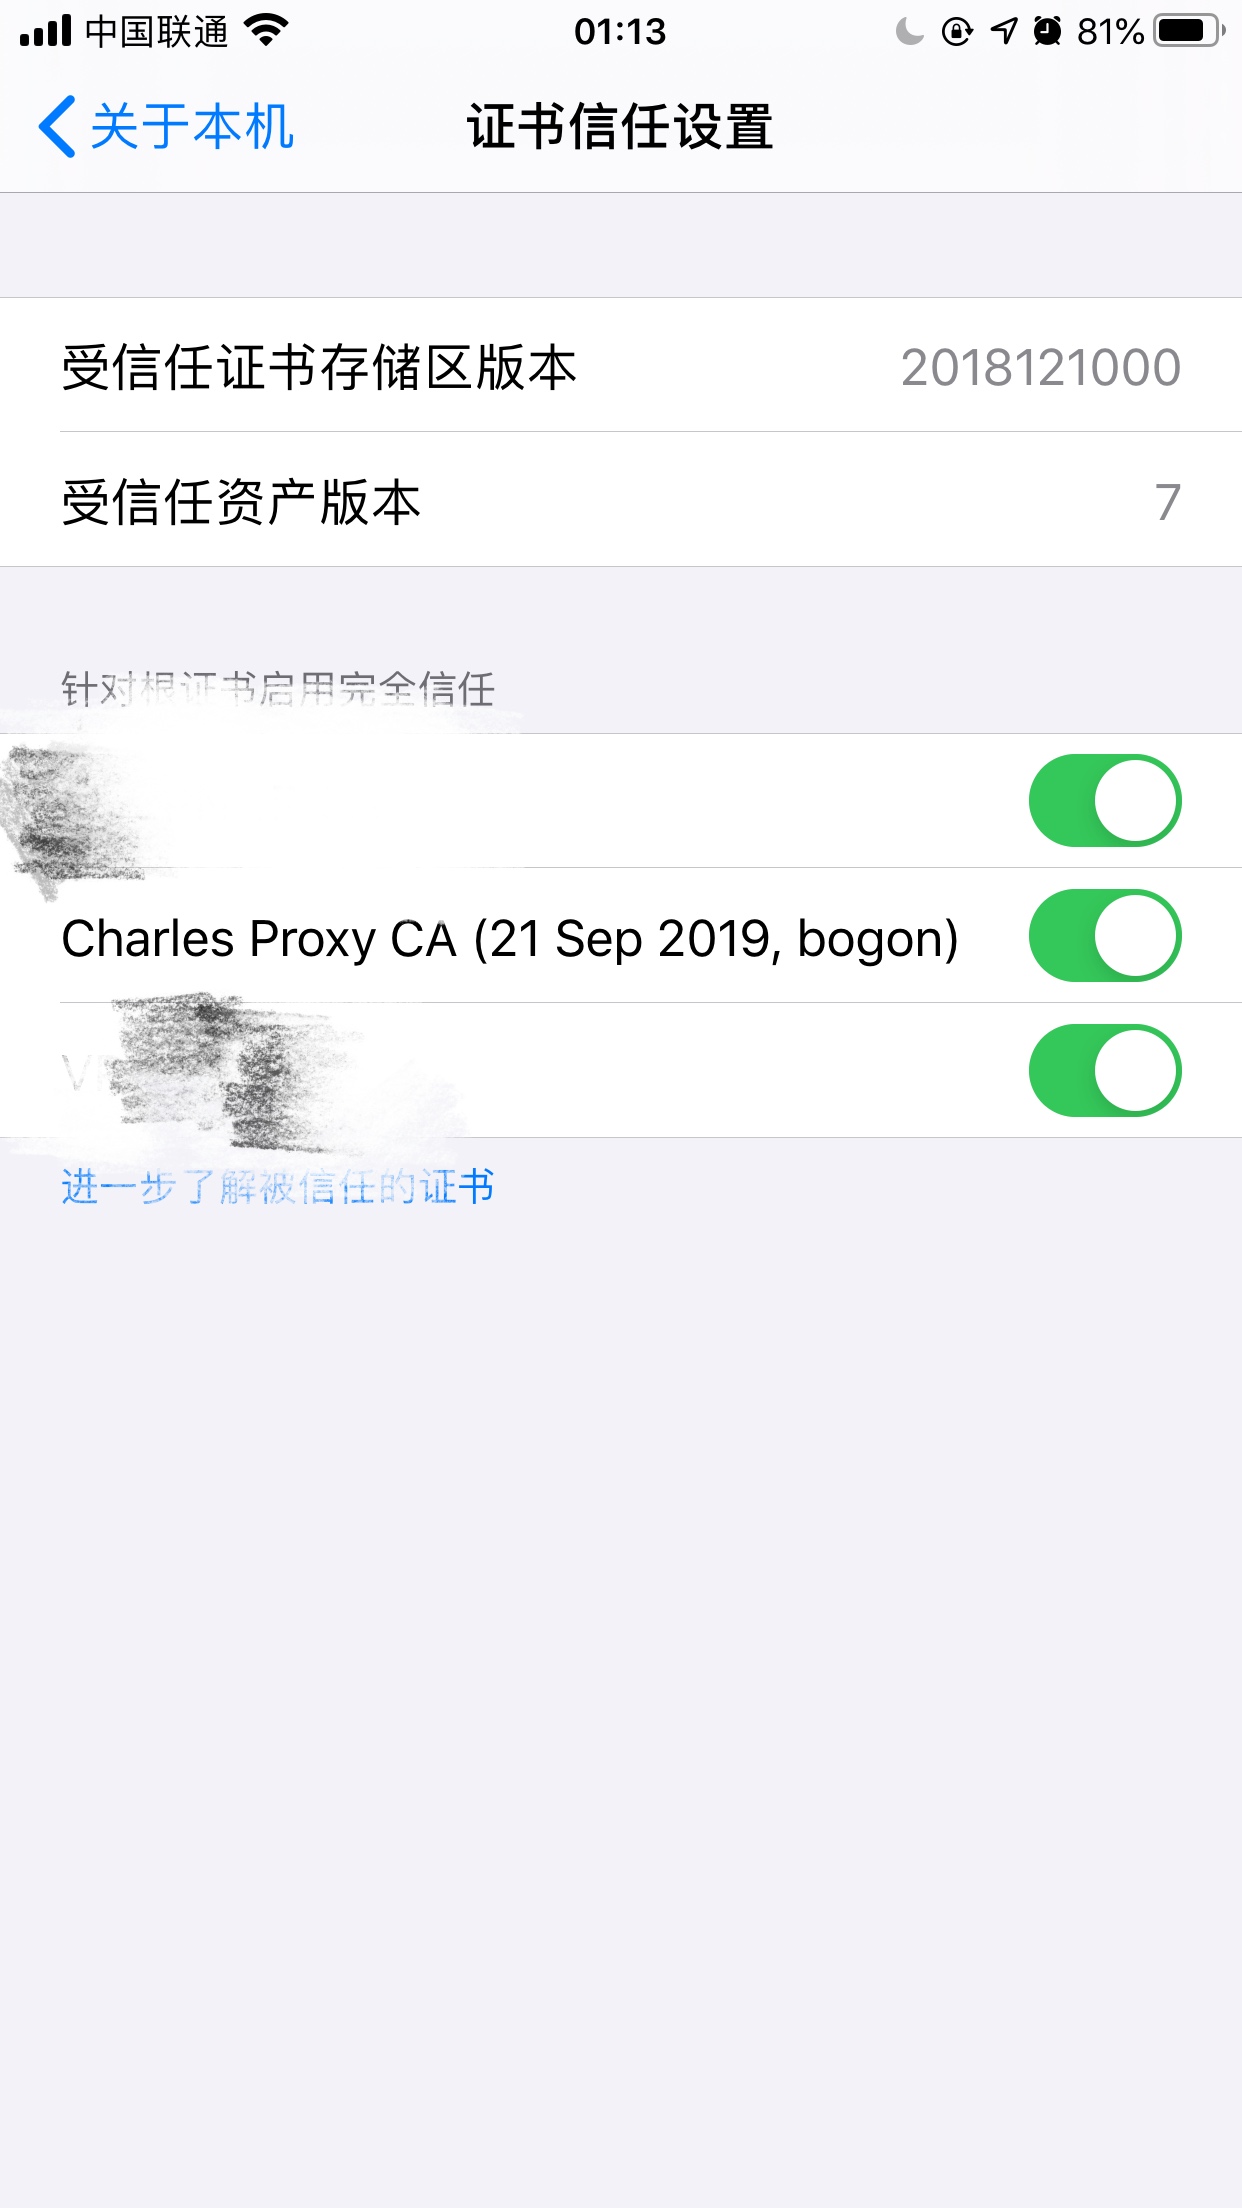
配置好Charles的http代理,并在iOS设备上配置wifi代理之后,打开Safari浏览器,输入: https://chls.pro/ssl. 浏览器将自动弹出下载和安装证书,安装成功后。打开“设置”,找到“通用>关于本机>证书信任设置”,并将Charles正式的信任开关打开,如图3:
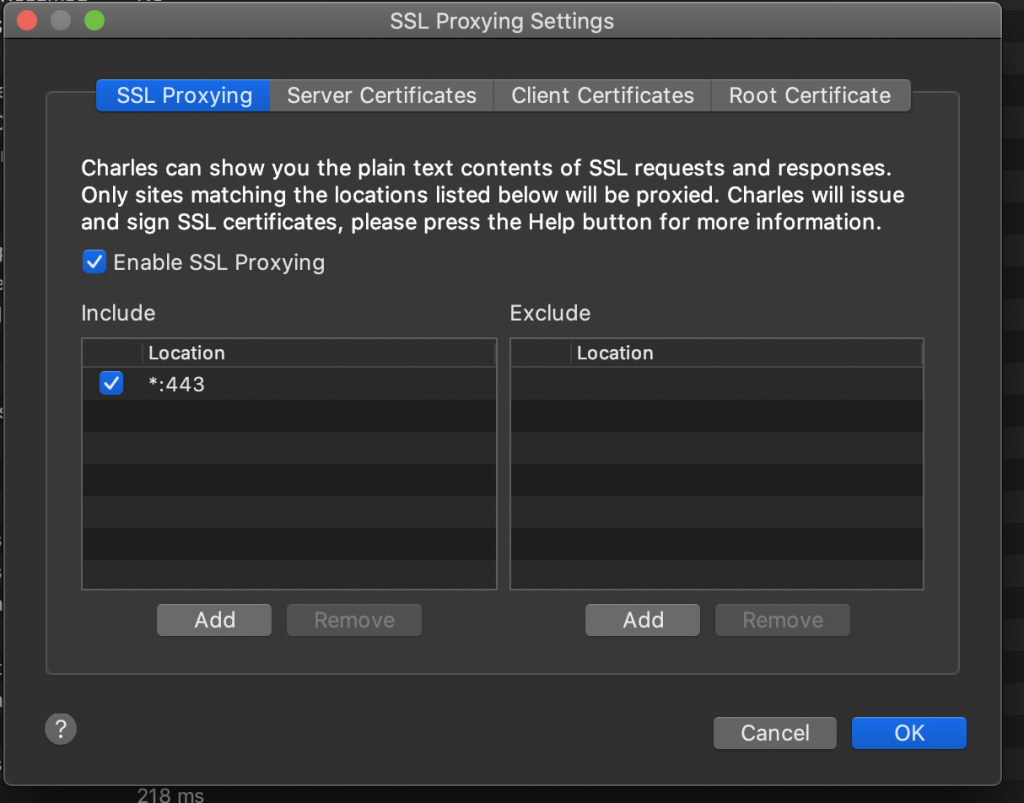
Charles打开SSL代理设置(“Proxy>SSL Proxy Settins”):
The host has a changing IP address (or none if you have no network access). From 18.03 onwards our recommendation is to connect to the special DNS name host.docker.internal
, which resolves to the internal IP address used by the host. This is for development purpose and will not work in a production environment outside of Docker Desktop for Mac.
The gateway is also reachable as gateway.docker.internal
.
link: https://docs.docker.com/docker-for-mac/networking/
Additional completion definitions for Zsh
brew install zsh-completions
To activate these completions, add the following to your .zshrc:
fpath=(/usr/local/share/zsh-completions $fpath)
plugins=(… zsh-completions)
autoload -U compinit && compinit
You may also need to force rebuild `zcompdump`:
rm -f ~/.zcompdump; compinit
Additionally, if you receive “zsh compinit: insecure directories” warnings when attempting to load these completions, you may need to run this:
chmod go-w '/usr/local/share'
在使用纯代码构建UI界面时,如果只是把NSViewController的View简单的Add到NSWindow中,则导致无法监听到action的。例如如下代码:
// mainwindow
let result = MainWindow(contentRect: AppConfig.windowRect, styleMask: .titled, backing: .buffered, defer: false)
result.styleMask.insert(.closable)
result.styleMask.insert(.miniaturizable)
result.title = NSLocalizedString("HomeTitle", comment: "")
result.titleVisibility = .visible
result.titlebarAppearsTransparent = false
result.delegate = result
result.center()
let viewController = MainViewController()
result.contentView?.addSubview(viewController.view)
// MainViewController
... ...
slPasswordLength.target = self
slPasswordLength.action = #selector(onChangedPasswordLength(sender:))
... ...
@objc private func onChangedPasswordLength(sender: NSSlider) {
tfPasswordLengthValue.stringValue = "\(sender.integerValue)"
scStepper.intValue = sender.intValue
}
错误的原因是在result.contentView?.addSubview(viewController.view)这一句,仅仅将view添加进去,正确的做法应该是将整个ViewController设置为MainWindow的contentViewController,如下:
let result = MainWindow(contentRect: AppConfig.windowRect, styleMask: .titled, backing: .buffered, defer: false)
result.styleMask.insert(.closable)
result.styleMask.insert(.miniaturizable)
result.title = NSLocalizedString("HomeTitle", comment: "")
result.titleVisibility = .visible
result.titlebarAppearsTransparent = false
result.delegate = result
result.center()
let viewController = MainViewController()
result.contentViewController = viewController
在开发Mac OS App的时候如果想使用自定义的字体,并且在发布的时候也带上自定义的字体库,则需要如下几个步骤:
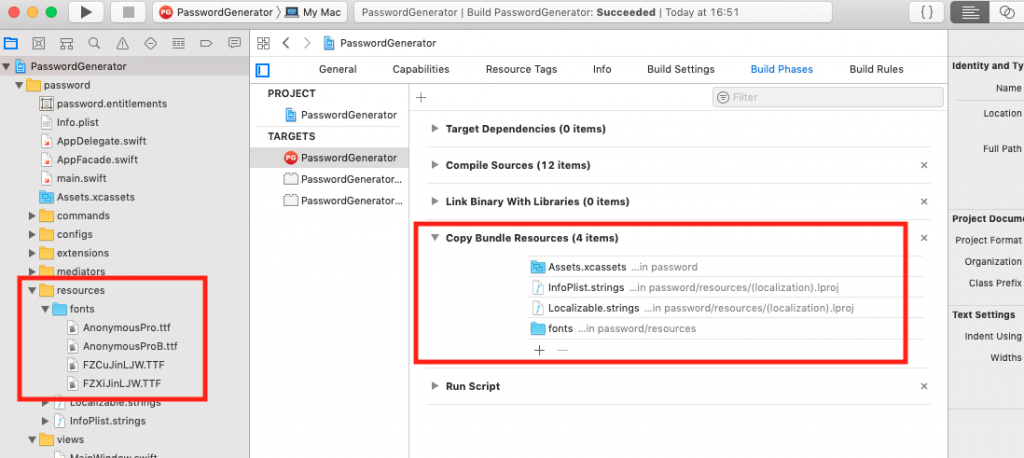
将字体文件拖拽(添加)到项目的资源库中。范例如下图:
新增Fonts provided by application及Application fonts resource path两项。
注意:Application fonts resource path是Mac OS App项目必填的,否则找不到字体文件,这点是与iOS项目不一样的,iOS项目只需要填写Fonts provided by application即可。范例如下图:
完成上述两个步骤,即可使用自定义字体了。
extension NSFont {
class func mainBoldFont(size: CGFloat) -> NSFont {
let font = NSFont(name: "FZCUJINLJW--GB1-0", size: size)
return font ?? NSFont.systemFont(ofSize: size)
}
class func mainFont(size: CGFloat) -> NSFont {
let font = NSFont(name: "FZXIJINLJW--GB1-0", size: size)
return font ?? NSFont.systemFont(ofSize: size)
}
}
Mac OS App的storyboard中无法直接使用自定义的字体,但是可以在代码中使用,这个问题我没找到原因,如果您找到了方法请告知我。谢谢!
PS: 查看所有可用字体代码片段
let manager = NSFontManager.shared
for name: String in manager.availableFonts {
print("font name=====" + name)
}
先测试Docker仓库的网络是否通畅
curl https://download.docker.com/linux/ubuntu
如果能够正常返回,则说明网络通畅,可进行下一步。
返回的范例如下:
302 Moved Temporarily
Code: Found
Message: Resource Found
RequestId: F509FDDBC0786438
HostId: T7hUnvhqto7LWjE1TrTrRSdCApMtS0RvKDkJjeJxBAdC8TKrAziaS4FE5xJGFqEeqLAHd8CxcRA=
如果第一步顺利通过,则可以添加apt源,命令如下:
$ sudo apt update
$ sudo apt install apt-transport-https ca-certificates curl software-properties-common
执行完上述命令后,添加docker.list文件
新增/etc/apt/sources.list.d/docker.list文件,并添加如下内容:
deb [arch=amd64] https://download.docker.com/linux/ubuntu bionic stable
添加docker源秘钥
$ curl -fsSL https://download.docker.com/linux/ubuntu/gpg | sudo apt-key add –
更新一下新添加的源
$sudo apt-get update
安装docker-ce
sudo apt install docker-ce
测试docker是否安装成功
$ docker –version
Docker version 18.09.1, build 4c52b90
在xcode 顶部menu>File>Workspace Settings>第一项build system改为legacy build system
During startup – Warning messages:
1: Setting LC_CTYPE failed, using “C”
2: Setting LC_COLLATE failed, using “C”
3: Setting LC_TIME failed, using “C”
4: Setting LC_MESSAGES failed, using “C”
5: Setting LC_PAPER failed, using “C”
[R.app GUI 1.50 (6126) x86_64-apple-darwin9.8.0]
WARNING: You’re using a non-UTF8 locale, therefore only ASCII characters will work. Please read R for Mac OS X FAQ (see Help) section 9 and adjust your system preferences accordingly.
answer:
defaults write org.R-project.R force.LANG en_US.UTF-8
在安装fir-cli时出现了如下错误:
$ gem install fir-cli
Fetching: thor-0.20.0.gem (100%)
ERROR: While executing gem ... (Gem::FilePermissionError)
You don't have write permissions for the /Library/Ruby/Gems/2.3.0 directory.
解决办法:
sudo gem install -n /usr/local/bin fir-cli